Maze Generator — Help
Reference for all main menus and settings. For step-by-step guides, see Guides.
Quick Start
- File: import/export, save, and load settings.
- Maze: Maze Size & Shape, Endpoints & reserved space, and Color & style (background, walls, cells).
- Image: upload, filters, placement, and background removal.
- Text: add and style text layers.
- Reset: use master reset actions.
- Help: open the full Help guide in a new tab; the Help menu also includes Flash Start / End, Patch Notes, and site links (Features, Privacy, Terms, Disclaimer).
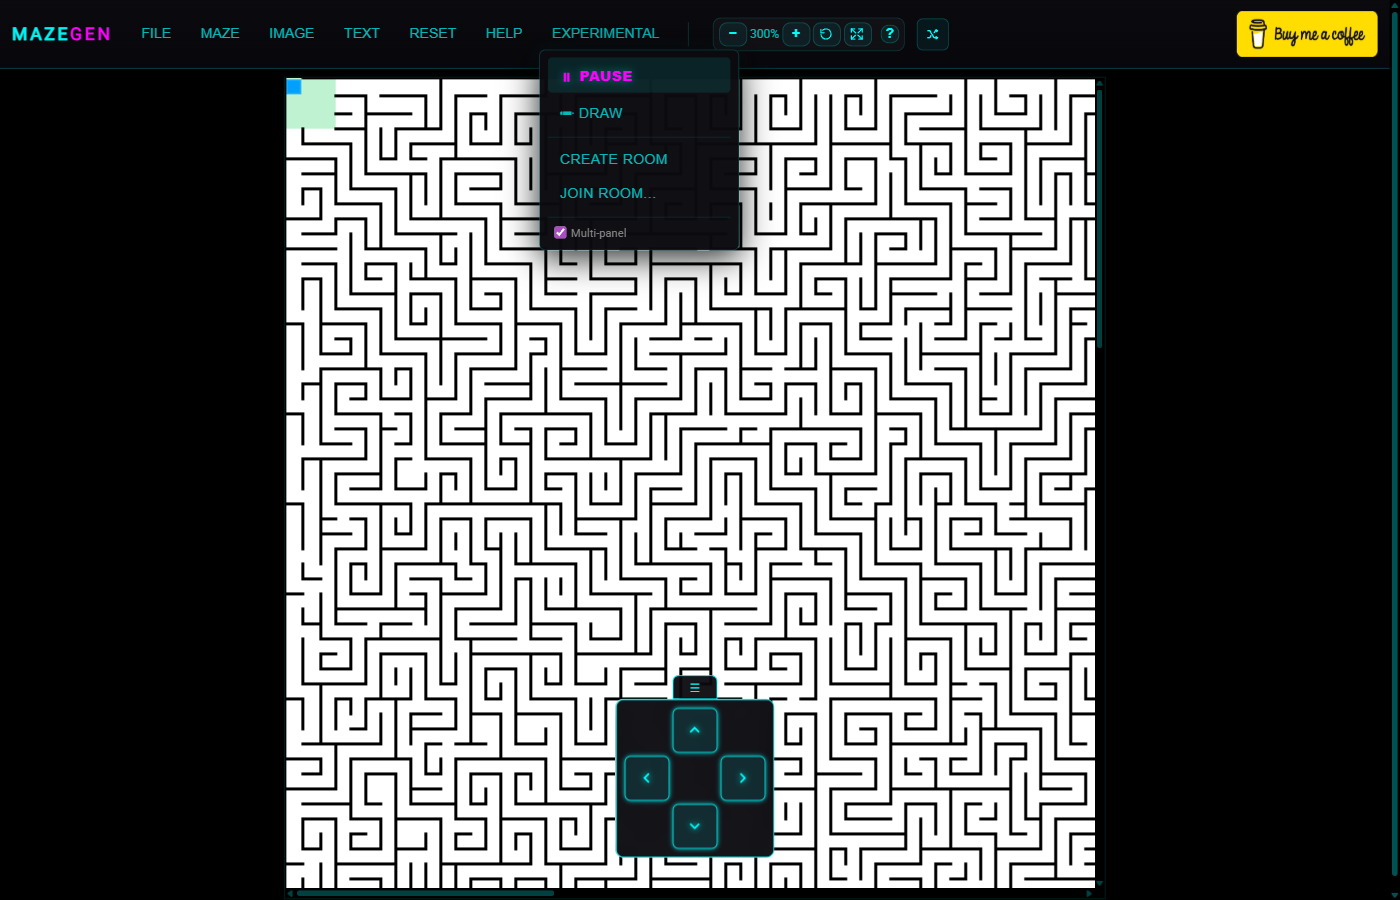
- Play: Experimental → Play (desktop) to walk the maze.
- Zoom controls: zoom 10%–500%, reset to 100%, or use the fit button to frame the whole maze.
- Maze output: the generated maze preview.
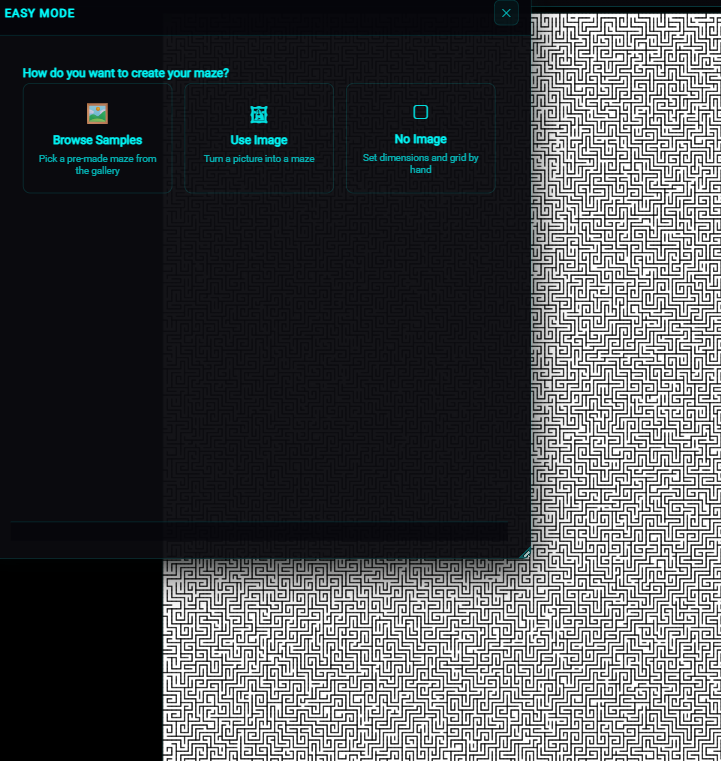
Easy Mode
Start from the landing screen
The landing screen shows a horizontal sample rail (scroll to browse). Use Browse all for the full searchable gallery. Below that, use Upload Image (you can also drop a file onto the button) or No Image to define the grid by hand.
Use a sample maze as a starting point
Click a thumbnail in the rail to load that sample, or click Browse all to open the Maze Samples window (search and grid). Each sample loads a full configuration.

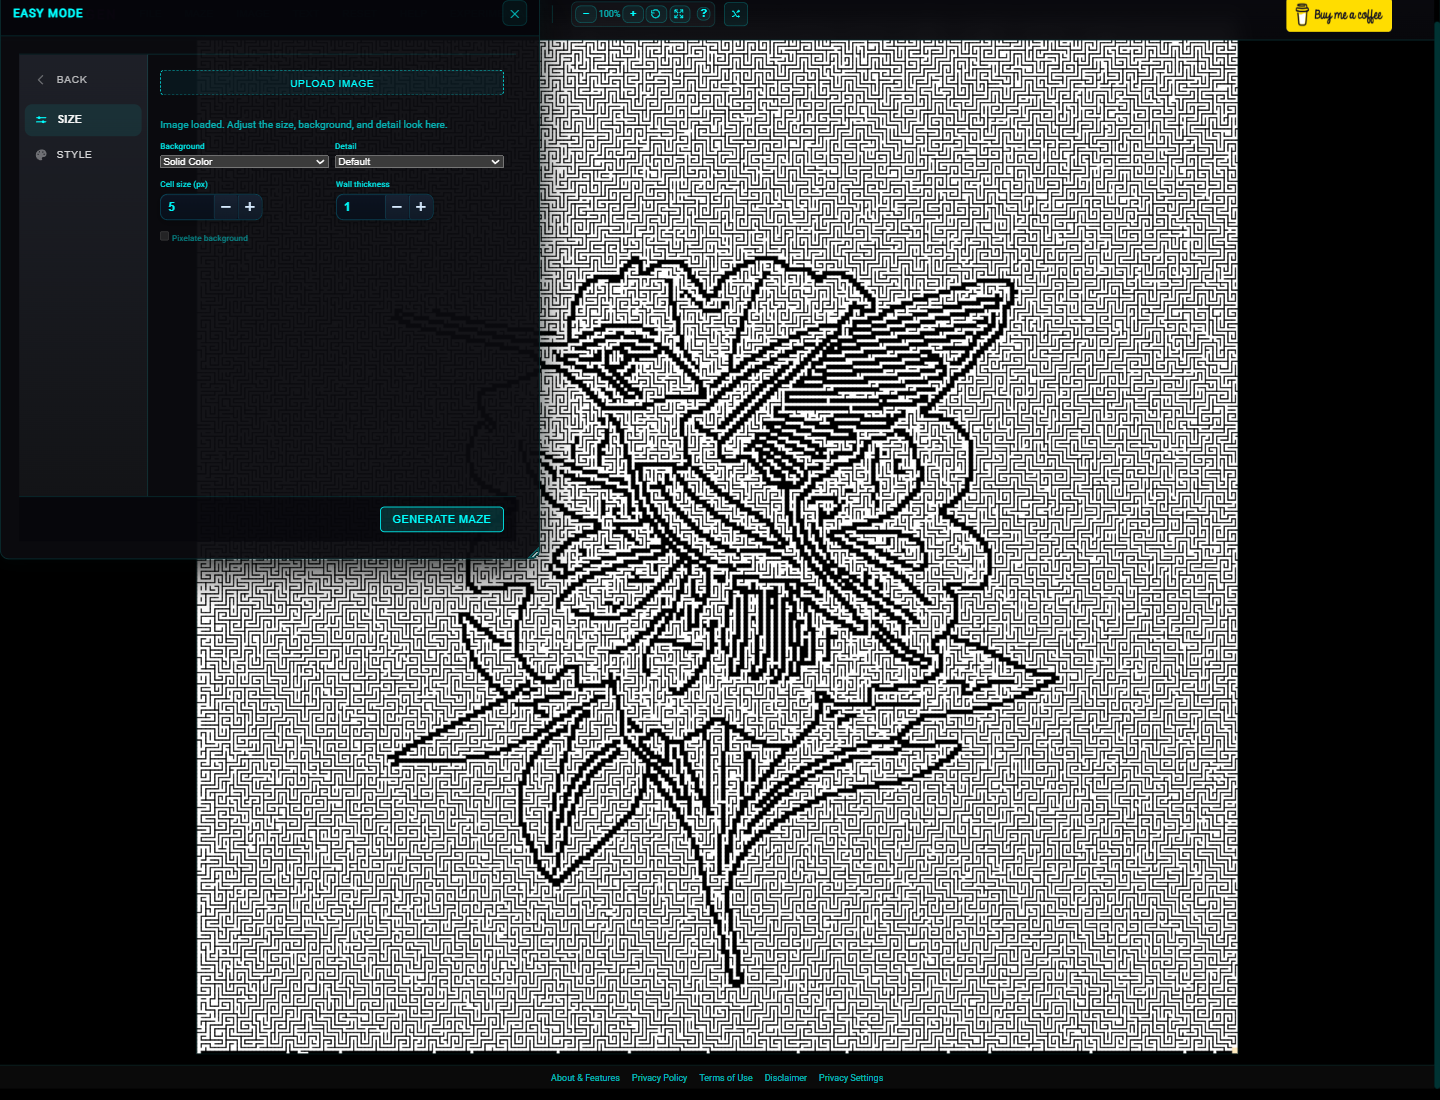
Upload your own image
- On the landing screen, choose Upload Image and pick a file (or drop it onto the button). On the image step you can click Upload Image again to swap files.
- Adjust Background (Solid Color or Colorized), Detail, Cell size (px), and Wall thickness.
- When Background is Colorized, optional Pixelate background applies a pixelated look to the path fill.
- Smaller cell sizes tend to show more image detail; larger values yield faster, chunkier mazes.
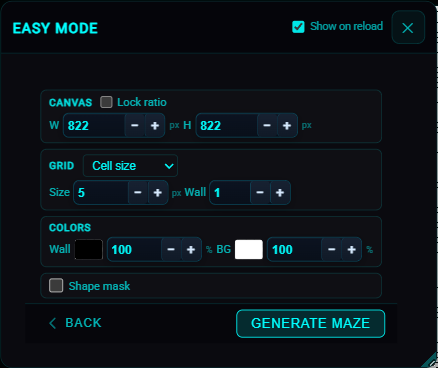
Start from a blank grid (no image)
Choose No Image to set Canvas width and height (optional Lock ratio), define the Grid by cell size or rows and columns, set Colors (wall and background with hex fields and opacity), and optionally turn on Shape mask (shape, fit, size, invert).
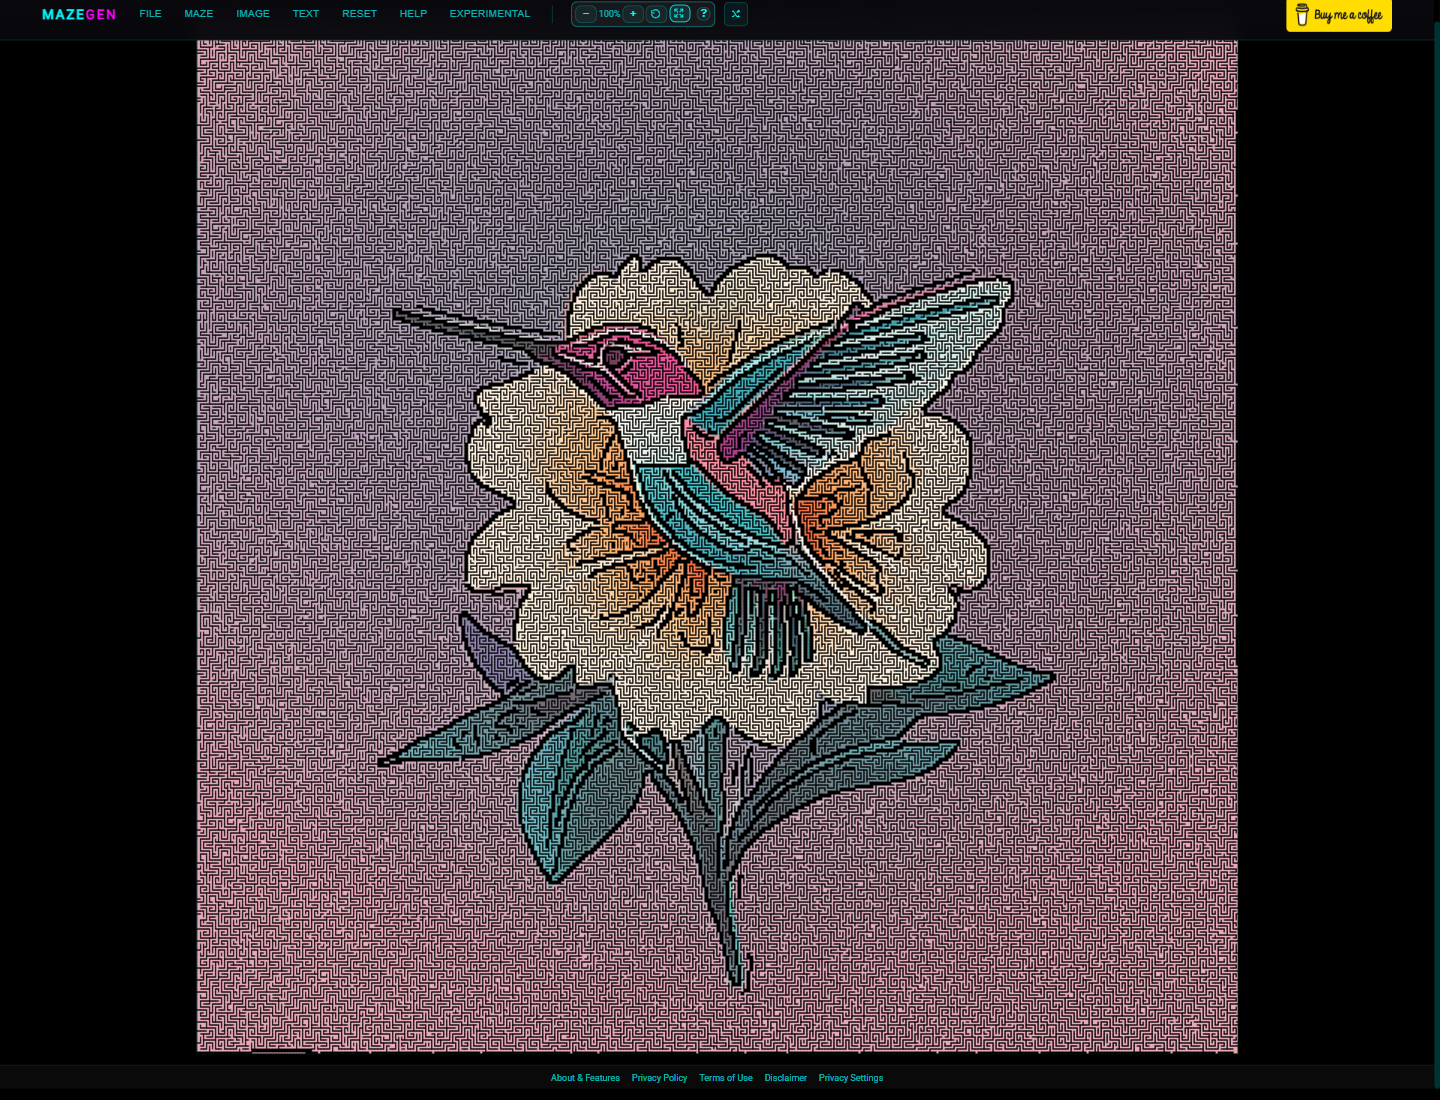
Create a colorized maze in Easy Mode
With an image loaded, set Background to Colorized. Use High Detail (under Detail) or a smaller Cell size (px) when you want more of the photo visible in the paths.

Generate the maze and keep iterating
Click Generate Maze to close Easy Mode and render into the main workspace. From there use the usual menus for export, filters, text, or endpoints.
For a focused photo-to-maze walkthrough, see the colorized mazes guide.
Maze Settings
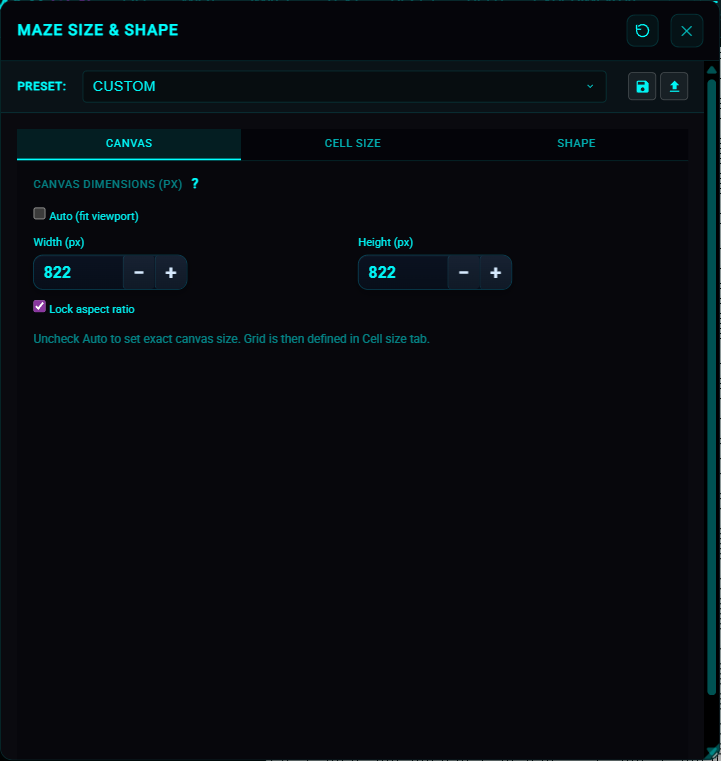
Maze Size & Shape
One modal with tabs: Canvas, Cell size, Shape. Switching tabs does not trigger regeneration.
- Preset: grid/canvas presets (e.g. Fine detail, 15×15, Auto fit viewport, Print ready); save/load icons export or import this section as JSON.
- Canvas tab: Auto (fit viewport) sizes the canvas to the workspace; uncheck it to edit Width (px) and Height (px) (32–4096) and optional Lock aspect ratio.
- Cell size tab: Define grid by Cell size (cell size in px, wall thickness) or Rows & columns (rows, cols).
- Cell size (px): 4–200 when defining by cell size.
- Rows & columns: set the grid dimensions when defining by rows/columns.
- Wall thickness: 1 up to one less than the current cell size; in Cell size tab.
- Shape tab: enable custom shape cutout; mask type (shape or pattern image), radius, fit mode, invert; area outside the shape uses the color set in Color & style → Outside mask.
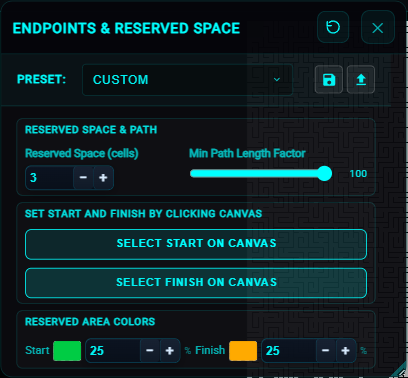
Endpoints & reserved space
- Reserved space size: padding (px) around start/finish.
- Min path length: factor to encourage longer routes.
- Start/finish: automated or select on canvas, then Confirm in the floating panel. Flash via Help → Flash Start / End.
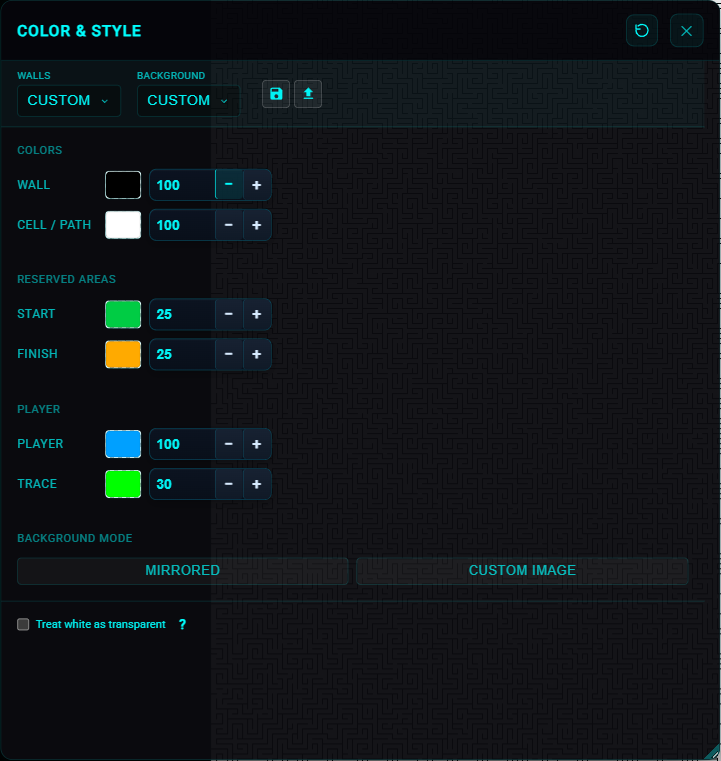
Color & style
Wall and background presets; colors for walls, cells/path, and outside mask; reserved area colors; background mode (Solid, Mirrored, Custom Image).
- Wall color & opacity: maze line color and transparency.
- Background preset: e.g. Outline No Color, Colorized Faint, Colorized Light, Colorized; save/load icons for JSON.
- Cell / Path color & opacity: base fill behind the maze.
- Outside mask: color for area outside the maze shape (Black, White, Transparent, or Custom).
- Background mode: Solid (color only), Mirrored (pattern image), or Custom Image (separate upload, scale/pan).
- Treat white as transparent: white pixels in pattern (and mirrored background) become transparent.
Image
Image menu opens: Blend Settings, Filters, Placement, and Background removal (and upload/image gallery from the toolbar).
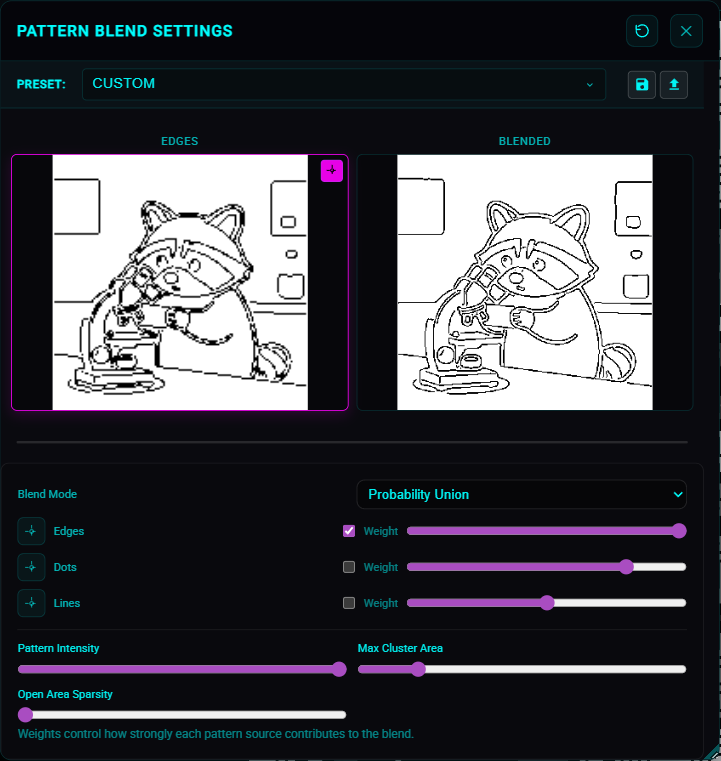
Blend Settings (pattern)
- Preset: combination or strength presets (e.g. Balanced, High detail).
- Preview: active pattern thumbnail and blended result; gear icon opens Edges/Dots/Lines settings.
- Blend mode: Probability Union, Any, Any 2, or All.
- Edges, Dots, Lines: toggle each source and set weight (0–100).
- Pattern intensity: 0–100 overall strength.
- Max cluster area: limit size of blocked regions (pattern blend).
Filters
- Preset: start from a filter preset.
- Before/After: filter preview comparison.
- Basic adjustments: brightness, contrast, saturation.
- Color channels: RGB channel balance.
- Blur: apply a Gaussian blur to the image.
- Invert: toggle color inversion.

Placement
- Preview: placement preview.
- Maintain aspect ratio: preserve proportions.
- Scale & pan: size and alignment controls.
Background Removal
- Original: original image preview.
- Result: masked preview.
- View masks: inspect generated masks.
- Auto mode: AI-driven background removal.
- Manual mode: manual mask edits.
- Custom mask editor: open the editor.
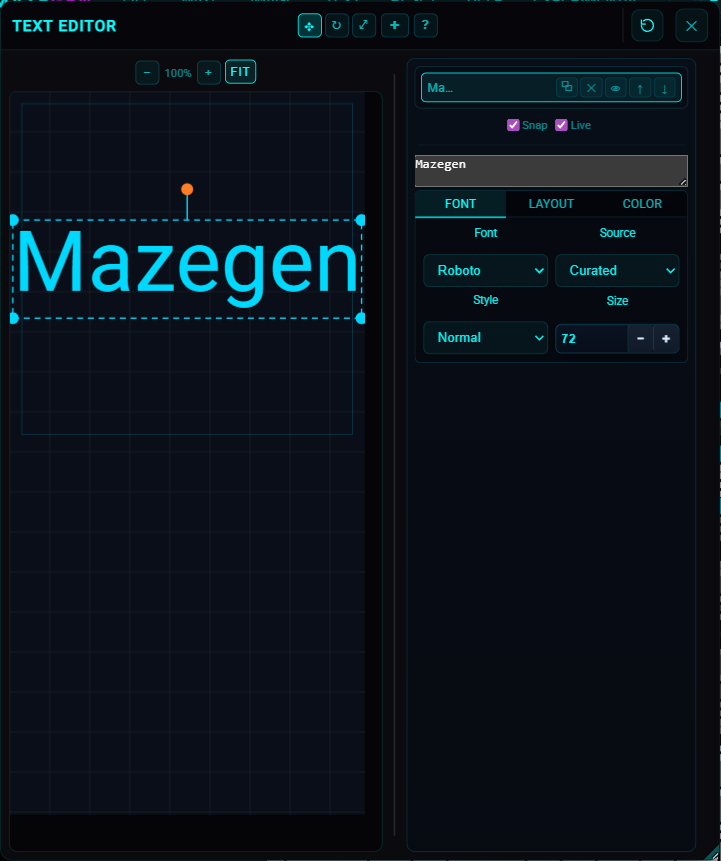
Text
Layer-based text editor: workspace preview (left) and sidebar with layers and settings (right). Double-click text on the canvas to edit inline. Text layers take priority over the image pattern in the maze. Google Fonts (Font tab → Source: Google Fonts) render correctly in the generated maze.
Layers & workspace
- Add layer: toolbar + button creates a new text layer.
- Layer list: click a layer to select it; use duplicate, delete, show/hide, and up/down arrows on each row.
- Workspace: drag to move, corner handles to scale, top handle to rotate; double-click to edit text inline.
- Snap to grid and Live preview: checkboxes below the layer list; live preview regenerates the maze as you edit.
Settings (tabs: Font, Layout, Color)
- Layer text: textarea for the active layer (or edit on canvas).
- Font tab: font source (Curated / Google Fonts), font, style, size (8–600 px). Google Fonts render in the maze when you generate.
- Layout tab: position X/Y, scale, letter spacing (tracking), line height, rotation, Max Cluster (hollow text).
- Color tab: Fill and Stroke color (with dropper to pick from maze), stroke width, Mask Tol (white = path mask).
Play Mode
- ▶ Play: under Experimental → Play (desktop). Enter play mode to walk the maze.
- D-pad: move through the maze (draggable).
- Start/Finish: blue square is start, target is finish.
Multiplayer (Experimental)
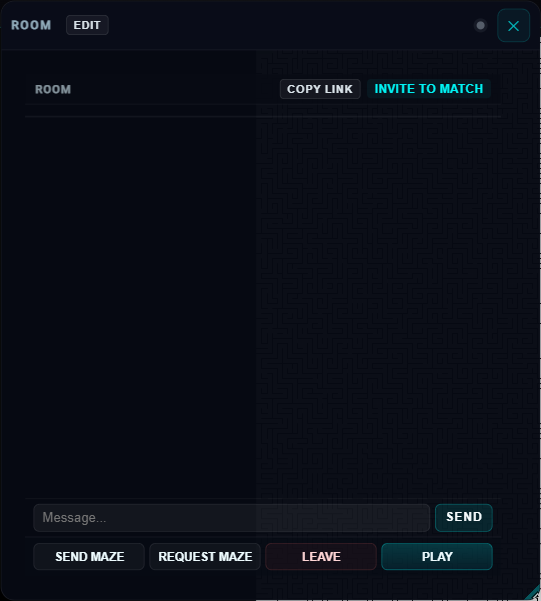
Create or join rooms to collaborate and play mazes with others in real time. All communication is peer-to-peer — no data passes through a central server.
Getting Started
- Create Room: Experimental menu > Create Room. A shareable link is generated.
- Join Room: Experimental menu > Join Room, or open a shared room link.
- Open Room: Re-opens the Room modal when already in a room.
Room Features
- Chat: Send messages to all peers. Desktop also has a floating chat widget.
- Send / Request Maze: Share your maze config or request a peer's.
- Play (Match Lobby): Invite peers to a match. Vote on whose maze to race through, ready up, and start together.
- Live Cursors: See peers' cursors on the canvas in real time.
- Draw Mode: Edit walls collaboratively (draw/erase thin or thick walls, freehand or line mode).
- Username: Edit your display name in the Room modal header. Name persists across refreshes for the same room.
Solve
- Solve: finds and shows solution paths.
Tips & Troubleshooting
- Performance: increase Cell Size, reduce blur, or avoid very large images.
- Mask issues: try Auto Mode again or refine with Manual Mode / custom mask editor.
- Alignment: use Placement scale/pan to align the pattern.
Shortcuts
- Mask editor pan: hold Space or Alt and drag (desktop).
- Straight strokes: hold Shift while painting.
- Close dialogs: Esc.